我想在iPhone OS 3.1.3中使用CATiledLayer,并将其全部引入
-(void)drawLayer:(CALayer *)layer inContext:(CGContext)context
现在我在iPhone上遇到了翻转坐标系的问题,有一些建议可以通过转换来解决:
我的问题是我不能让它工作。我开始使用PhotoScroller示例代码,并用coregraphics调用替换drawing方法。看起来像这样
- (void)drawLayer:(CALayer *)layer inContext:(CGContextRef)context {
CGContextSaveGState(context);
CGRect rect = CGContextGetClipBoundingBox(context);
CGFloat scale = CGContextGetCTM(context).a;
CGContextConcatCTM(context, CGAffineTransformMakeTranslation(0.f, rect.size.height));
CGContextConcatCTM(context, CGAffineTransformMakeScale(1.f, -1.f));

CATiledLayer *tiledLayer = (CATiledLayer *)layer;
CGSize tileSize = tiledLayer.tileSize;


tileSize.width /= scale;
tileSize.height /= scale;
// calculate the rows and columns of tiles that intersect the rect we have been asked to draw
int firstCol = floorf(CGRectGetMinX(rect) / tileSize.width);
int lastCol = floorf((CGRectGetMaxX(rect)-1) / tileSize.width);
int firstRow = floorf(CGRectGetMinY(rect) / tileSize.height);
int lastRow = floorf((CGRectGetMaxY(rect)-1) / tileSize.height);
for (int row = firstRow; row <= lastRow; row++) {
    for (int col = firstCol; col <= lastCol; col++) {
     //   if (row == 0 ) continue;
        UIImage *tile = [self tileForScale:scale row:row col:col];
        CGImageRef tileRef = [tile CGImage];
        CGRect tileRect = CGRectMake(tileSize.width * col, tileSize.height * row,
                                     tileSize.width, tileSize.height);
        // if the tile would stick outside of our bounds, we need to truncate it so as to avoid
        // stretching out the partial tiles at the right and bottom edges
        tileRect = CGRectIntersection(self.bounds, tileRect);
        NSLog(@"row:%d, col:%d, x:%.0f y:%.0f, height:%.0f, width:%.0f", row, col,tileRect.origin.x, tileRect.origin.y, tileRect.size.height, tileRect.size.width);

        //[tile drawInRect:tileRect];
        CGContextDrawImage(context, tileRect, tileRef);
// just to draw the row and column index in the tile and mark the origin of the tile with a red line
        if (self.annotates) {
            CGContextSetStrokeColorWithColor(context, [[UIColor whiteColor]CGColor]);
            CGContextSetLineWidth(context, 6.0 / scale);
            CGContextStrokeRect(context, tileRect);
            CGContextSetStrokeColorWithColor(context, [[UIColor redColor]CGColor]);
            CGContextMoveToPoint(context, tileRect.origin.x, tileRect.origin.y);
            CGContextAddLineToPoint(context, tileRect.origin.x+100.f, tileRect.origin.y+100.f);
            CGContextStrokePath(context);
            CGContextSetStrokeColorWithColor(context, [[UIColor redColor]CGColor]);
            CGContextSetFillColorWithColor(context, [[UIColor whiteColor]CGColor]);
            CGContextSelectFont(context, "Courier", 128, kCGEncodingMacRoman);
            CGContextSetTextDrawingMode(context, kCGTextFill);
            CGContextSetShouldAntialias(context, true);
            char text[30];
            int length = sprintf(text,"row:%d col:%d",row,col);
            CGContextSaveGState(context);
            CGContextShowTextAtPoint(context, tileRect.origin.x+110.f,tileRect.origin.y+100.f, text, length);
            CGContextRestoreGState(context);
        }
    }
}

CGContextRestoreGState(context);
}
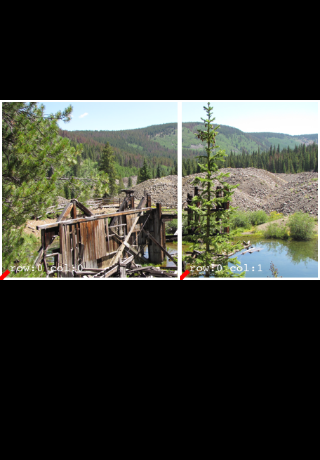
这就是它的样子:
我对这些转变有点困惑。
附加问题:
如何处理视网膜核心图形显示图片?
为了让它在视网膜显示器上工作,我从示例代码中提取了原始方法来提供图像:
- (UIImage *)tileForScale:(CGFloat)scale row:(int)row col:(int)col
{
// we use "imageWithContentsOfFile:" instead of "imageNamed:" here because we don't want UIImage to cache our tiles
NSString *tileName = [NSString stringWithFormat:@"%@_%d_%d_%d", imageName, (int)(scale * 1000), col, row];
NSString *path = [[NSBundle mainBundle] pathForResource:tileName ofType:@"png"];
UIImage *image = [UIImage imageWithContentsOfFile:path];
return image;
}
原则上,由于核心图形工作在
像素不是点
多谢
托马斯


